Tuesday, January 15, 2013

More about Test Tiles

I am done. 

Well, okay, I'm not DONE. But I am done.

My final count is 202 vertical hexagonal test tiles and 37 horizontal tiles. I only did thirty-seven because I got tired and don't want to make any more, frankly. But I have enough to do the horizontal tests that I really need to have.

But I thought I would show you just exactly what I did to each one of those tiles, just so you know I haven't been slacking as much as it would appear. 

As you know from the previous blog post, I had extruded and cut a bunch of tiles. Some of them didn't make it, fell completely apart, which is why I have 202 instead of 210. I only have to have 196, but you never know how what might happen in the bisque, so it's good to have extras.

What follows is a pictorial guide of what my process for each tile was. On the first side I ran a roller stamp down the length.


This will give the glazes something to break and pool in.

Next I smooth the lip and smooth the body for as close to a "clean" surface as possible. As you'll see, I think the more information the better.


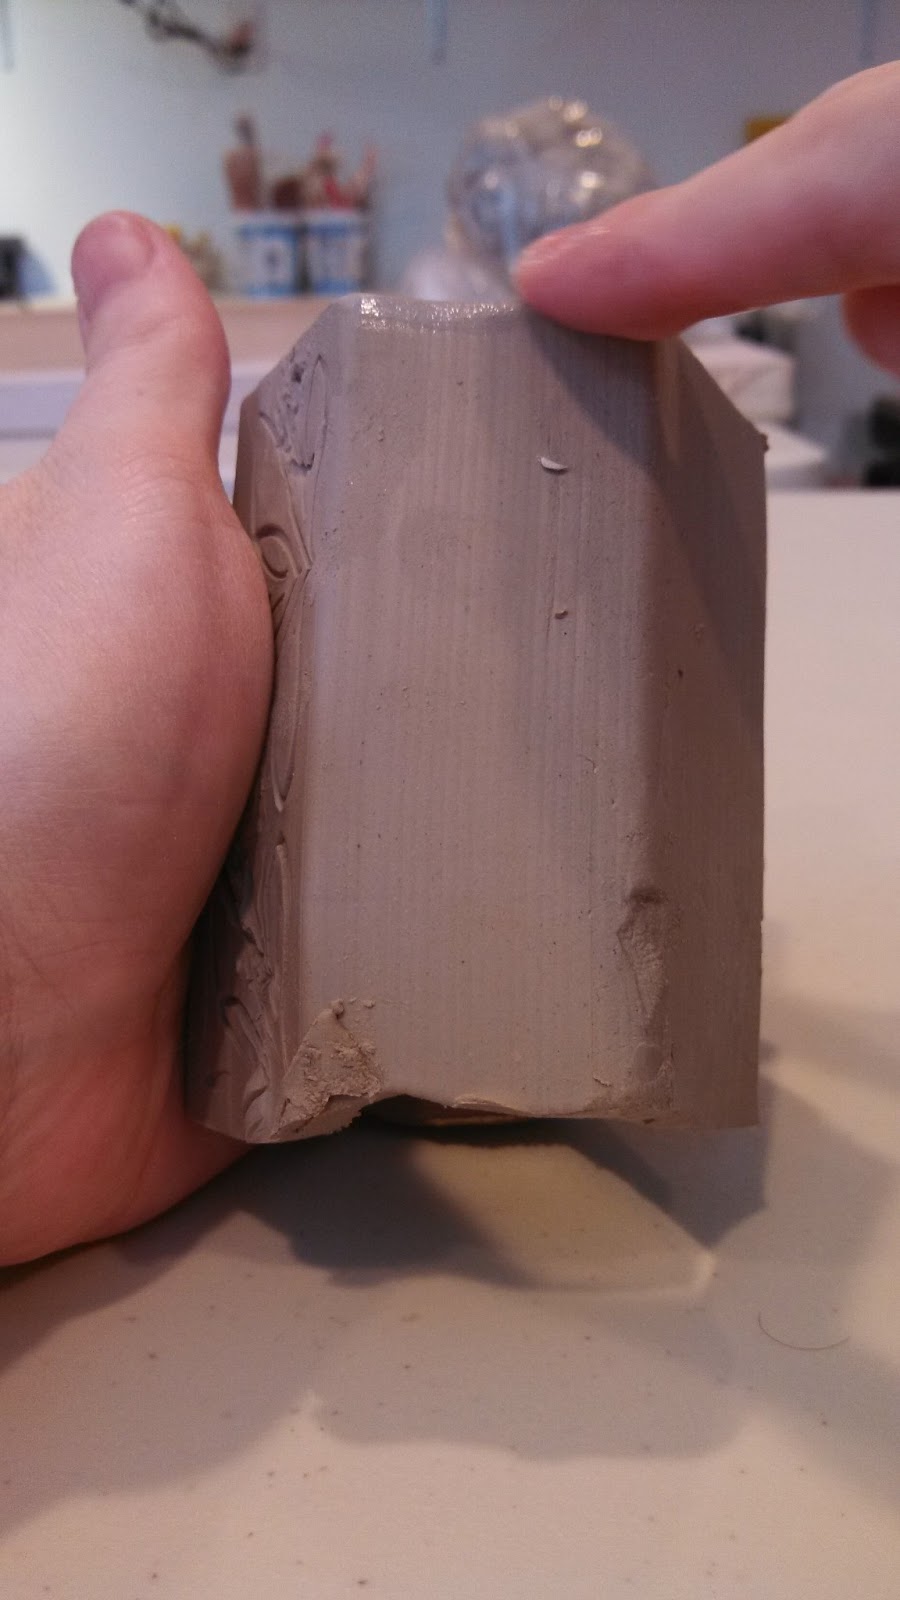
The rounded lip will hopefully let the glaze flow instead of break.

On the third side I do a bit of slip trailing. This is almost an opposite of the stamp texture.


On the fourth and fifth sides I will be running a stripe of Strontium Crystal Magic Warm and Strontium Crystal Magic Cool (recipes courtesy of Steven Hill in a recent Ceramics Monthly journal). I also want to see how they behave over different textures as well as smooth, so I stamped and marked in a couple of different ways.


On the last side, I pierced a hole for hanging. Once these are bisqued, I'll set out my grid and use an underglaze pencil to mark what each one is on this side. Then I'll wax it and start glazing!


As you can imagine, it took a while to complete all of them, but I'm Done!


Oh, yeah, then there's the horizontal tiles. These are circles cut from a slab. I used a soft texture on half, a harder texture on a quarter and will have another quarter that's smooth. On these guys I'll write what they are on the back before I wax them. Then they'll fire flat on the shelf.


Then I decided that I'd better mark which tests I really needed that horizontal info on, turns out I have just enough! No extras, so cross your fingers, kiss your kiln goddesses and dance a jig for me they all make it! 

Thursday, January 3, 2013

Test Tile Time

There are a lot of ways to make test tiles. A simple slab bent into an L shape with a hole at the top for hanging on a peg board may be one of the easiest. I've tried a lot of different tiles and there is one consistent result. The information I get is not complete. so I set about designing and making the perfect test tile.

What I need to know is a complete run of (1)what one glaze over another glaze will look like, (2)I need a variation with a stamp impression, (3) a variation with a slip trail, (4) what does Strontium Crystal Magic Warm added to the mix?, (5) SCM-Cool?, and finally (6) I need both horizontal and vertical tests to see what/if gravity has any effect.


I made a spread sheet to show what glazes go over and which go under in order. Then I drew what I thought would give me the information I needed. Then I wondered - How exactly am I going to be able to reference this? can I hang this on a peg board? How long is it going to take me to make these tiles? How many do I need? (min. 196, btw.)

Frankly, there is a tile that is perfect in shape, gives me all the info that I'm looking for based off a tile that Julia Galloway and Lilly Zuckerman used in a glaze workshop I took at the Archie Bray. A larger version of that extruded die would be perfect. One problem. I don't have a clue how to make a die. I have a blank, but don't feel I have the time to teach myself this. I need tiles now. So this is how I started.

I threw a ring on my 16" bats. The issue is how to make these big enough, wide enough, tall enough AND storable.


So then I thought smaller versions on my 6" bat inserts would be the trick, I can throw a 3/4# ball into a  horizontal and vertical surface at the same time. But that dang storage issue comes up again.

So back to the extruder I went. A hexagonal cylinder is still the best option, the fastest to make, cut, alter as necessary. Now I just need to make at least 200 of them. And for the horizontal surface information, I think I'll just make slabs to cut, with a hole and the corresponding tests can hang on the same peg.

2' lengths of hexagonal cylinders for cutting.

Cut to 3 1/2 inch heights.
Slip trailed, Stamped, SCM Warm and Cool, a nice big hole for hanging and the side that will be marked  what glazes are involved. One side is also completely smooth.

And now, if you'll excuse me, I've got some test tiles to make.